

How To Build A Wall Cabinet Youtube
This post almost building your ain DIY kitchen cabinets is sponsored by PureBond Plywood. All opinions are my own. This post also contains chapter links. Come across disclosure policy for details.
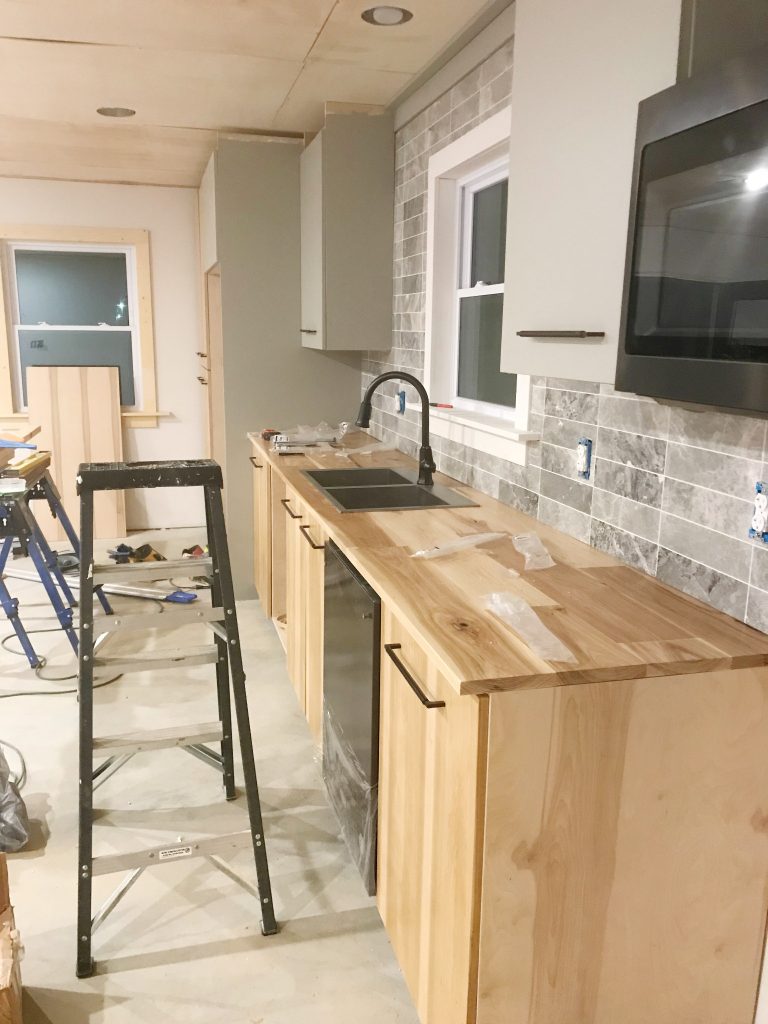
Building your own DIY kitchen cabinets seems like a pretty intimidating projection…or is it just me? When nosotros started planning out our garage apartment house, I was like, "building my ain kitchen cabinets?? HA! No big deal!"
.
So the closer nosotros got to time to really first DOING the work, my tune inverse a little to something more like this, "Building KITCHEN CABINETS?! AM I INSANE??"
.
Merely when y'all're in the middle of a loftier stakes six week renovation claiming and living with your mother in law until you can get your new house livable, you just grit your teeth and get to piece of work. Do your best and caulk the rest, right?? HA.
.
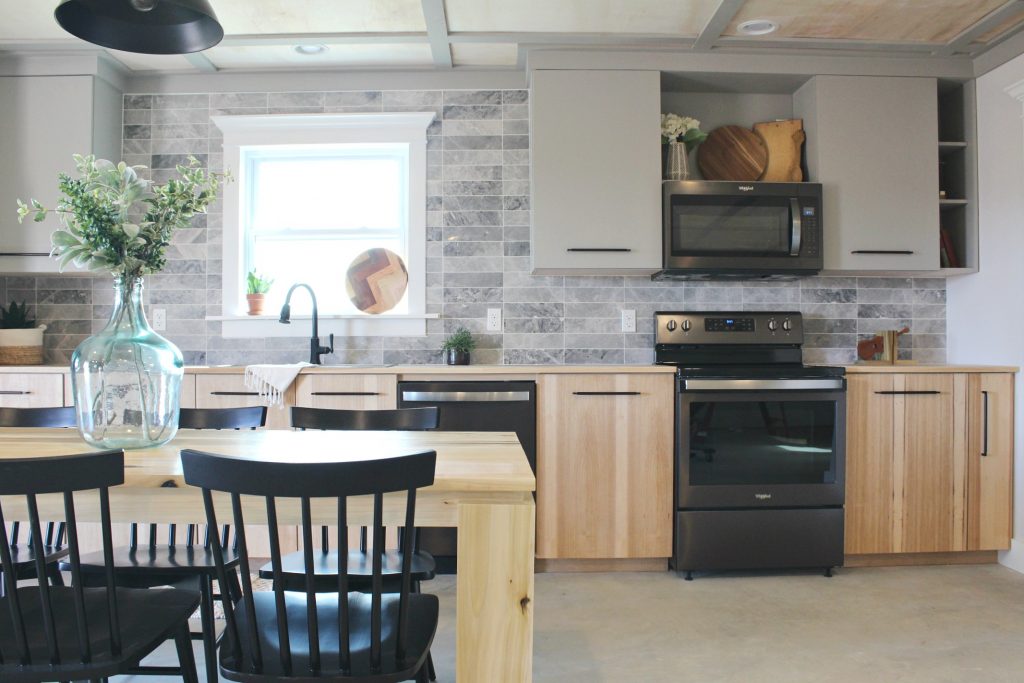
But, you know what I found out?? Building your own DIY cabinets is actually an easy project to take on and it's totally doable with simply a few basic tools and some expert quality plywood.

Jump to:
- Why I Built My DIY Cabinets Using Simply Plywood
- What yous will demand to build your own DIY Kitchen Cabinets:
- Stride 1: Determine and Cutting Cabinet Depth
- Stride 2: Cut Base Kitchen Cabinet Carcass Pieces
- Step 3: Cut Out Toe Kicks on Base Cabinets
- Stride iv: Apply Edge Banding
- Step five: Gather the Base Kitchen Cabinet Boxes
- Step six: Add together Backs to DIY Cabinets
- Step seven: Add Doors, Drawers, Shelves to Cabinets
- Step 8: Install DIY Base of operations Cabinets
- Stride 9: Get together Upper Kitchen Cabinet Boxes
- Footstep x: Install Ceiling Trim (Optional)
- Step 11: Finish DIY Kitchen Cabinets
Why I Congenital My DIY Cabinets Using Just Plywood
I congenital ALL my DIY kitchen cabinets from plywood. PURE PLYWOOD. I didn't plane, bring together, or mill a single slice of hardwood (except for the countertop).
.
And since plywood is much easier on the wallet than solid hardwood, that saved a ton of money…and we all know how cheap I am 😉 But without having to factory all the lumber, it saved, most of all, Time. Plus I didn't need a ton of fancy tools!
..
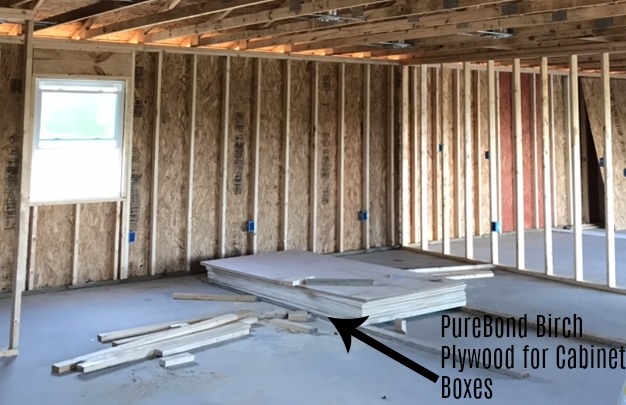
I built my cabinet carcasses using full sheets of ¾" Birch PureBond Plywood because they are more toll efficient and the carcasses wouldn't actually exist showing.
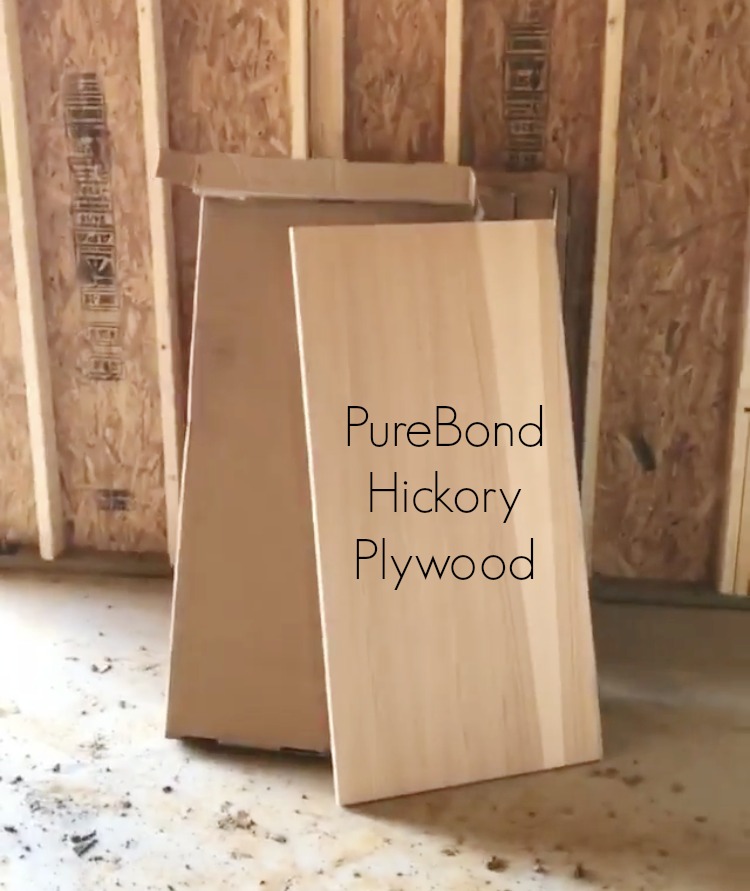
Simply I wanted a actually overnice, natural color for the bottom doors, and then I used the ¾" Hickory ii'x4' PureBond Plywood panels for the doors on the base cabinets and pantry.
Then even if y'all don't want to build all new cabinets, but just want to replace your chiffonier doors, all you demand is a little plywood and some edge banding and everyone will be complimenting you on your cabinets 😉
.
PS If y'all're looking for a more traditional style door, cheque out this tutorial to make Shaker style doors.
.
And so, let's get to building these cabinets. I've got a video for you here, only there's a lot of info to cover, so yous'll find some extra helpful tips I didn't accept fourth dimension to mention in the video below in this post.
What yous will need to build your own DIY Kitchen Cabinets:
Materials:
- ¾" Birch PureBond Plywood (full sheets are best, but 2×eight sheets would work as well)
- ¾" Hickory 2×4 PureBond Plywood Panels
- ¼" Birch PureBond Plywood (full sheets are best, just ii×8, 2×4, or 4×four sheets would work likewise)
- ane ¼" pocket hole screws
- Birch Edge Banding
- Hickory Edge Banding
Tools:
- Circular saw
- Kreg Rip Cut
- Kreg AccuCut
- Kreg Track Horses (optional)
- Drill
- Miter Saw
- Jig Saw
- Kreg Pocket Hole Jig
- Tape Measure
- Square
- Pencil
- Iron
RELATED: Check out the Top Ten Tools I Recommend for Chiffonier and Piece of furniture Building in this post.
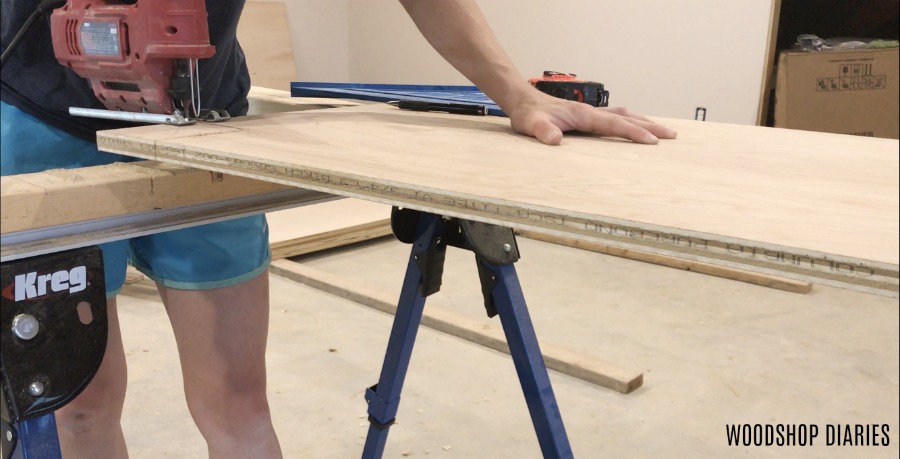
Step 1: Decide and Cut Cabinet Depth
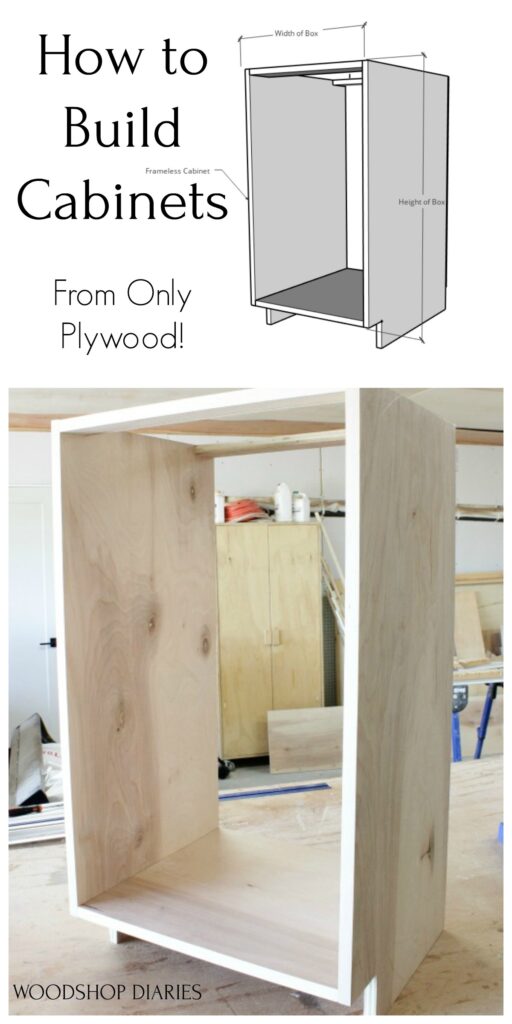
A Notation Near Cabinet Depth: I congenital these DIY cabinets frameless, with total overlay doors to avoid having to utilise anything except plywood to build them. That said, the total depth of my base cabinets including the door was well-nigh 24" deep and upper cabinets was almost 13 ¾". If yous want to change the depth of your own cabinets, rip your plywood narrower or wider every bit needed.
.
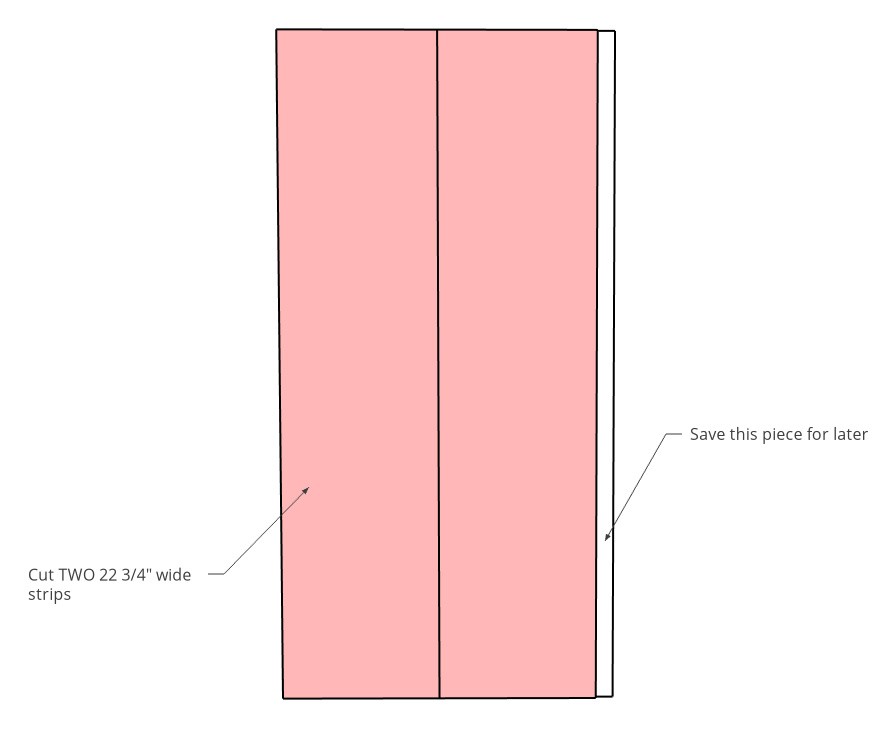
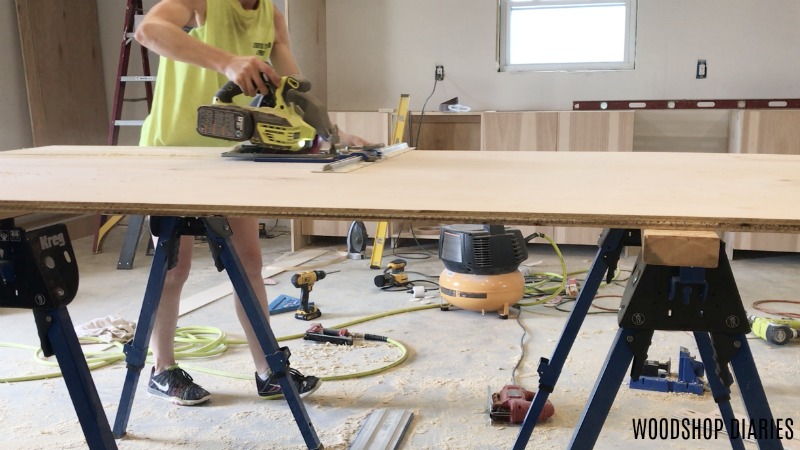
So for my base cabinets, I ripped my full plywood sheets downwards to 22 ¾" strips. I saved the sparse strip leftover to use later equally the top supports.
For a detailed guide on how to cut down a plywood sail, cheque out this mail service.
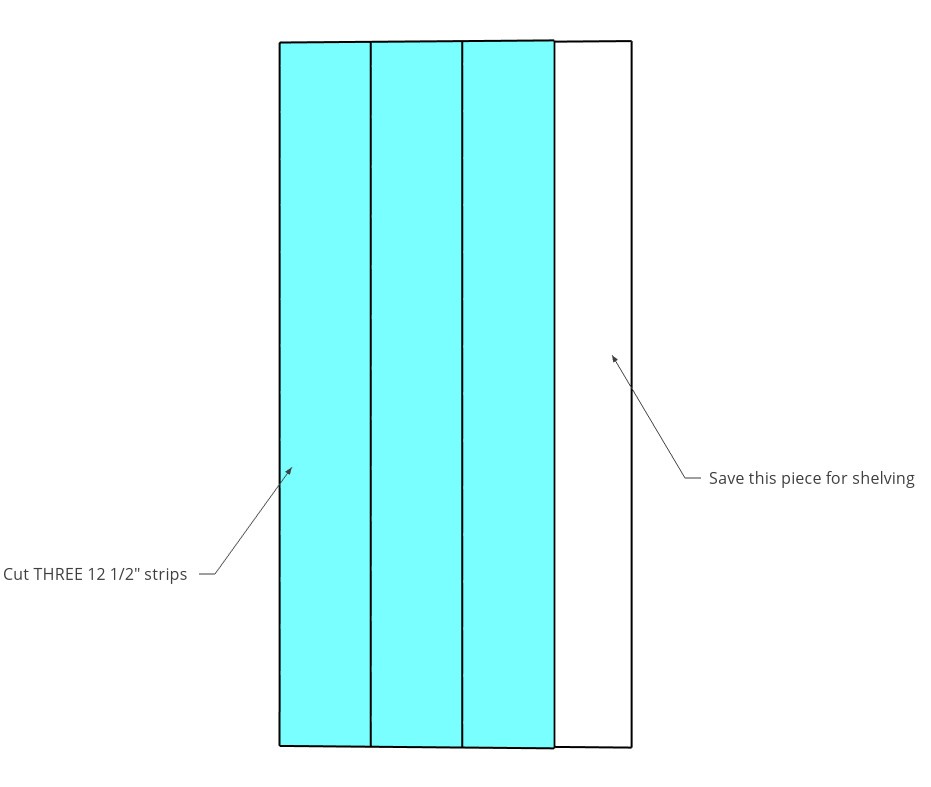
For my upper cabinets, I ripped my plywood to 12 ½" wide. Once you rip 3 strips at 12 ½" wide, you have a strip about 10 ½" or so leftover. Save this for your shelves afterward.
Step 2: Cut Base Kitchen Chiffonier Carcass Pieces
Typical base cabinet peak is about 34 ½" tall and then you have a ane ½" countertop to make information technology 36" full.
.
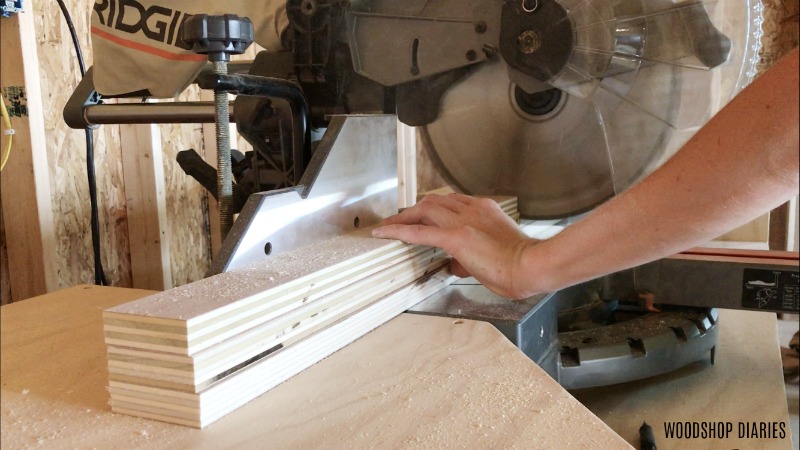
I recommend sticking to that standard and cutting your base side panels 34 ½" long. I cut two side panels from each 22 ¾" strip from pace 1.
For this, I used my Kreg AccuCut and circular saw for quick, make clean cuts. See more on how to cutting down plywood here.
.
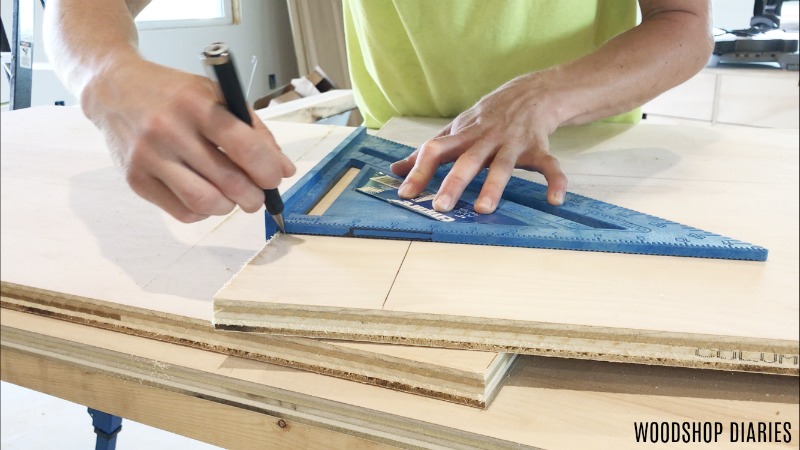
From the remaining plywood, I cut the bottom panel. Here's a helpful diagram:
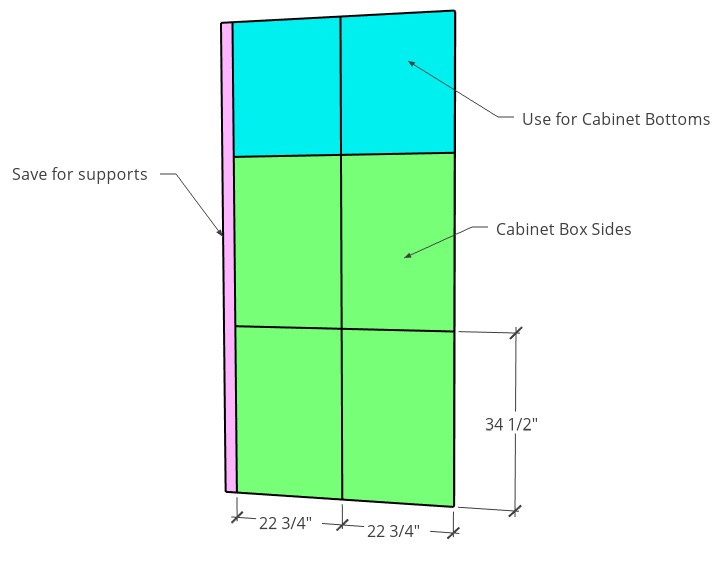
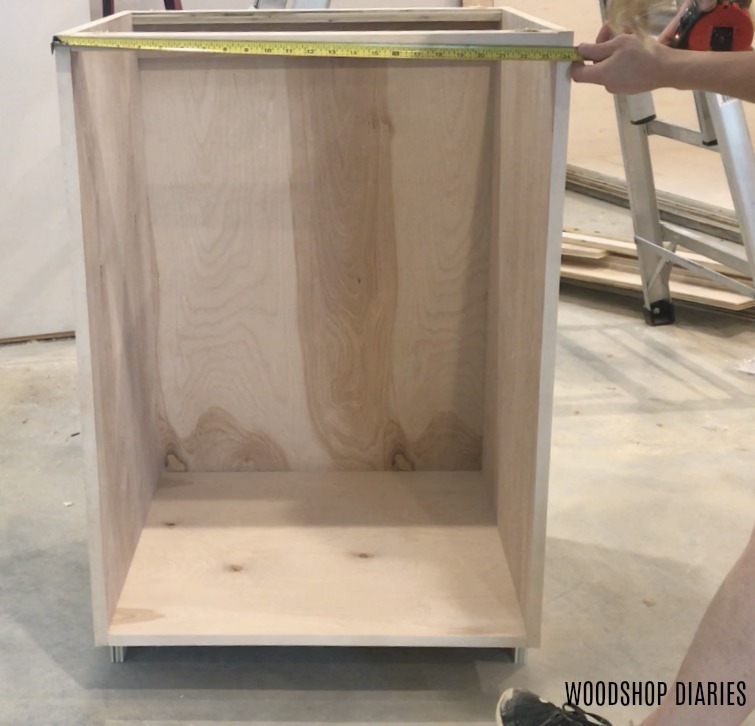
A Note About Cabinet Width: I made my kitchen cabinets overall size 24 ¼" wide. This was so that I didn't have to trim the width of the 24″ wide Hickory Plywood Panels for my doors. (Check out this mail for door sizing guidance.) And so that's what my measurements volition be based off of.
However, if you lot want different cabinet sizes, it'southward like shooting fish in a barrel to modify. Merely take the overall width y'all desire your cabinet box to be and subtract one ½″. That is the length you lot need to trim your lesser panel and tiptop support pieces.
.
In my case, 24 ¼″ – 1 ½″ = 22 ¾″.
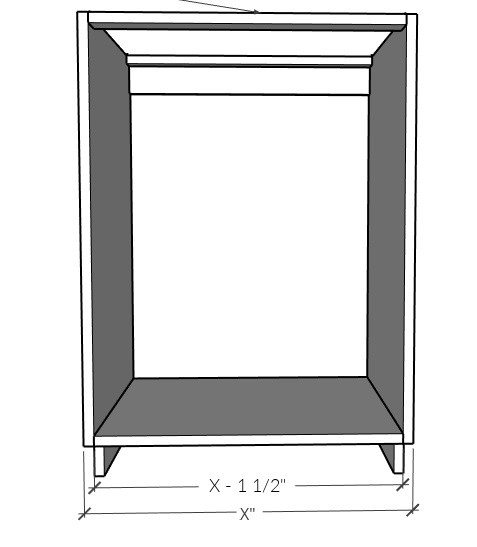
I cutting 3 top supports to the same length as my lesser panel (in my case, 22 ¾″ long) for each base cabinet. Remember that thin strip leftover from footstep one ripping the plywood for base cabinets? That'south what I used for this.
Footstep 3: Cutting Out Toe Kicks on Base Cabinets
Now before assembling, I needed to add two more details.
.
Most kitchen cabinets take toe kicks on the base of operations cabinets. Y'all can go without toe kicks, but I am pretty careless and rough on things, and so I would exist accidentally kicking the bottom of the cabinets constantly and scuffing them upwardly. So I added toe kicks.
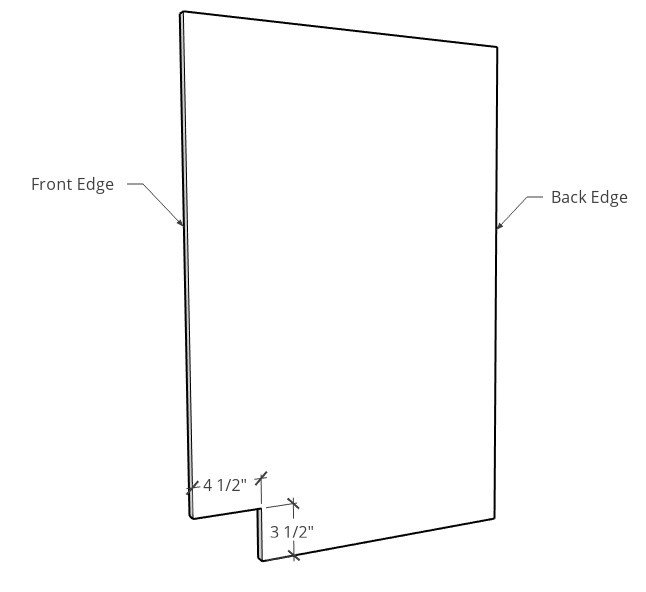
To do this, I drew a line three ½" from the BOTTOM of EACH base of operations chiffonier (only the base of operations, not the uppers) side panel and another line 4 ½" in from the front bottom side of the side console. The corner where these lines come across needs to be cut out with a jig saw.
Stride 4: Apply Edge Banding
The last detail earlier assembling the carcasses, is calculation border banding. Since these are frameless DIY kitchen cabinets, there won't be a frame on front to cover the plywood edges.
.
Then, I applied iron on edge banding on the FRONT edges of my cabinet pieces in order to hide them. This goes on the Front sides of everything that will be exposed.
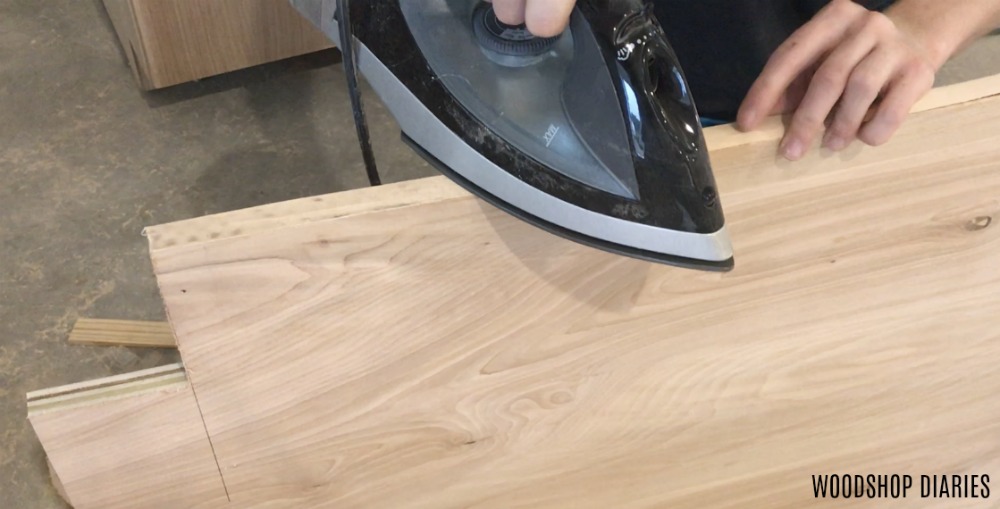
I sanded everything well before moving on.
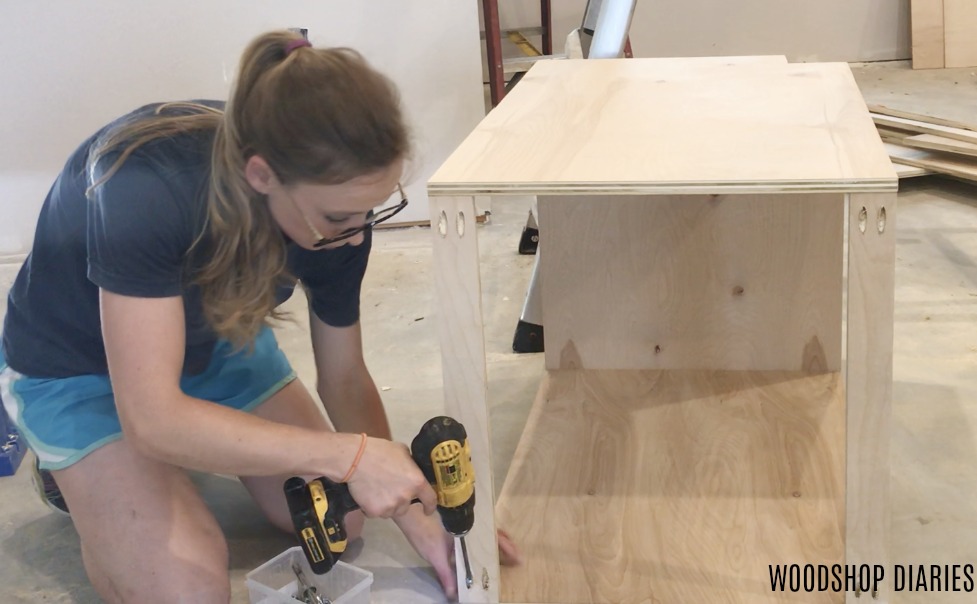
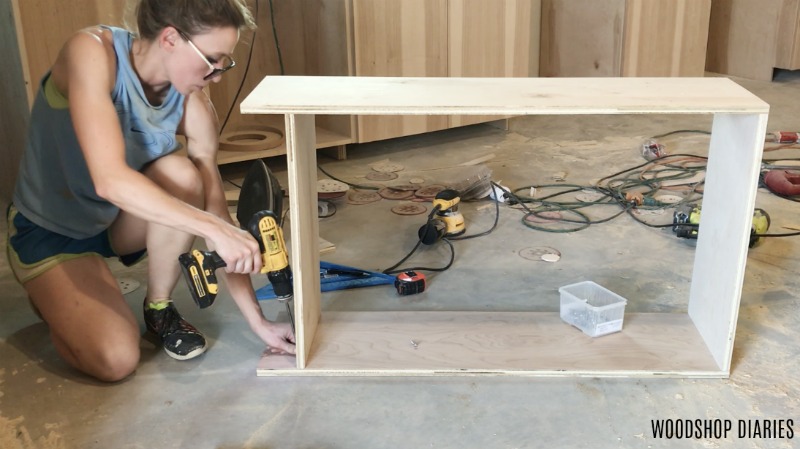
Step 5: Assemble the Base Kitchen Cabinet Boxes
I used ¾" pocket holes and ane ¼″ pocket hole screws to assemble these cabinet boxes. I drilled pocket holes along the side edges of the bottom panel and the ends of the support pieces.
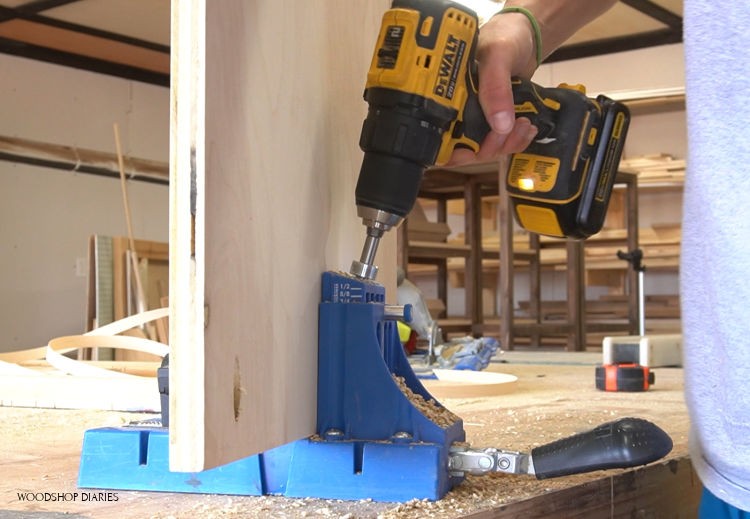
I attached the bottom console between the side panels 3 ½" from the bottom of the sides–simply above the toe kick. So, I fastened the three support strips so that 1 runs along the dorsum, and two along the top-one in the front and i in the back.
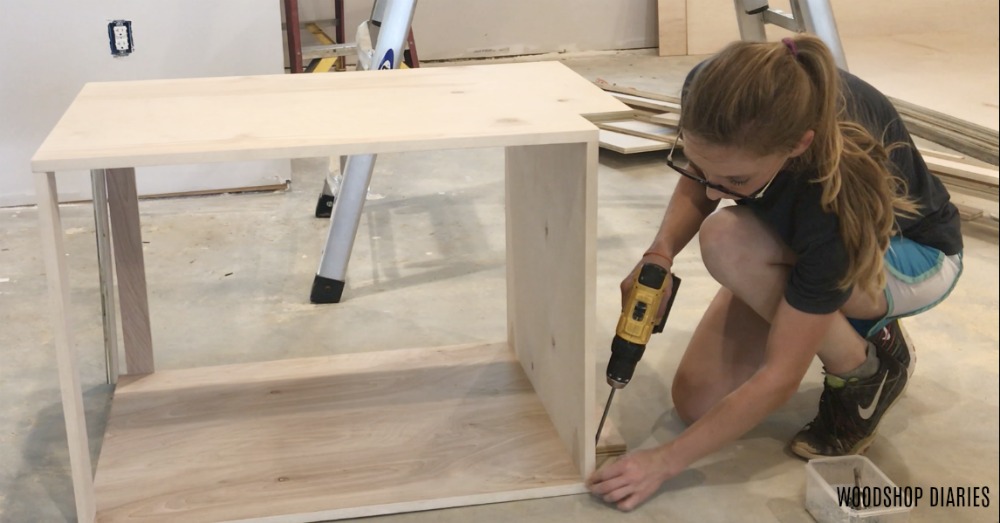
Make certain the i in the front end is the one with the edge banding applied. That gives y'all your chiffonier box.

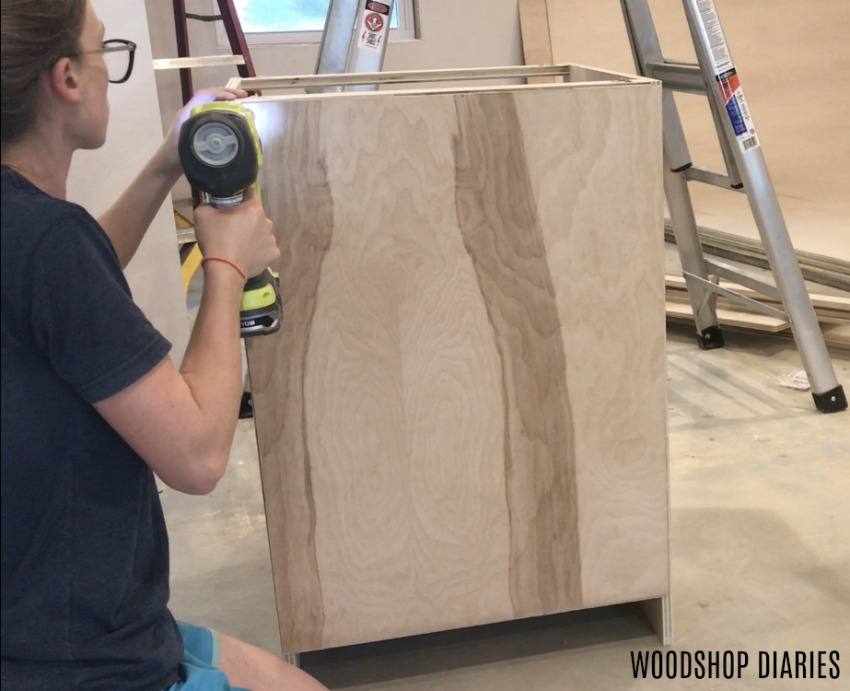
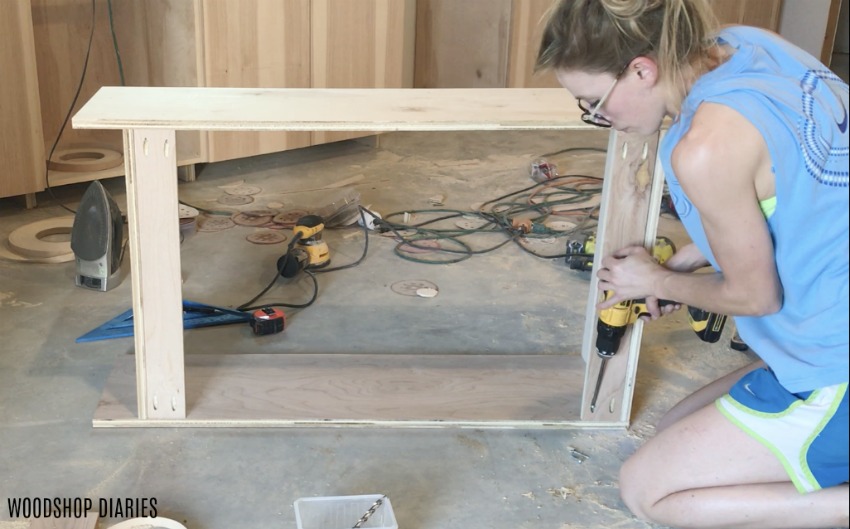
Step 6: Add Backs to DIY Cabinets
Adding the backs sounds pretty simple…and it is. Just information technology'south also a disquisitional function of the process. Make certain when cutting your back panels, that they are square and make certain when you attach them, that your cabinet is also square to this back piece.
.
I cut ¼" PureBond plywood panels to fit over the back side of my chiffonier boxes. Merely boom or staple in place.
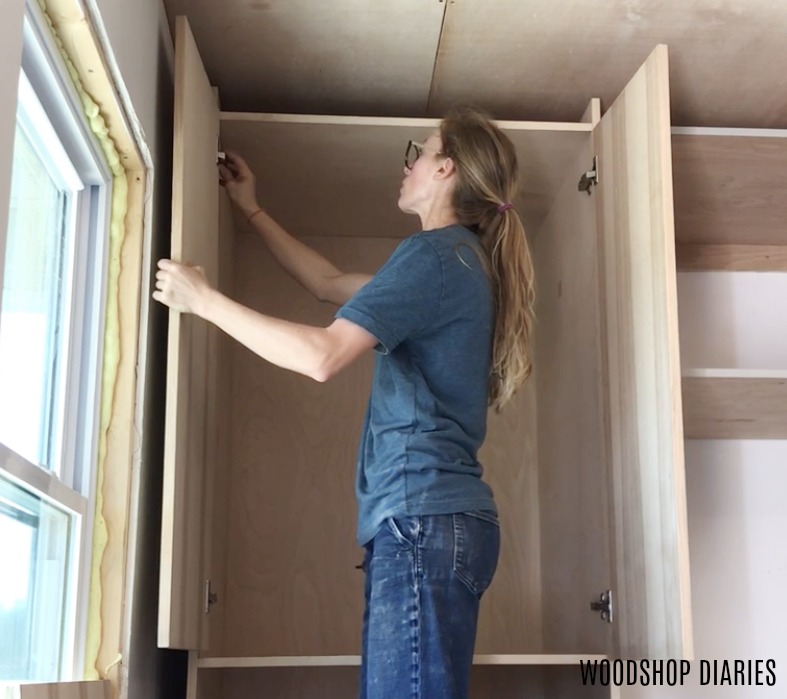
Footstep 7: Add Doors, Drawers, Shelves to Cabinets
Cabinet Doors:
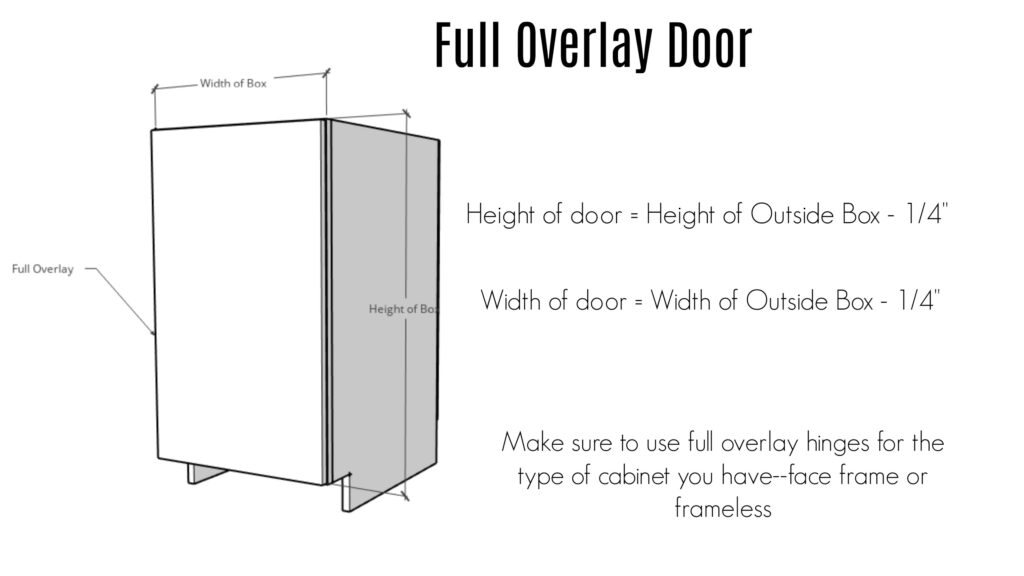
At present, I fabricated full overlay doors for most of my cabinets. I wanted the unabridged cabinet carcass to exist hidden and basically let the doors steal the prove.
.
Then to cut the doors, I measured my chiffonier box and cut the hickory panels ¼" smaller on in both directions than the front of the box.
.
And then my boxes were 24 ¼" x 32 ½" and I cut my doors 24" x 32 ¼". Brand sense?
I've got a full explanation for how to size your cabinet doors in this post if you desire more details.
.
Once they were cut to size, I practical hickory border banding to all sides of the doors and sanded well.
.
I've also got a whole postal service over here showing how to install these doors using soft close concealed hinges. Check that out for all the details.
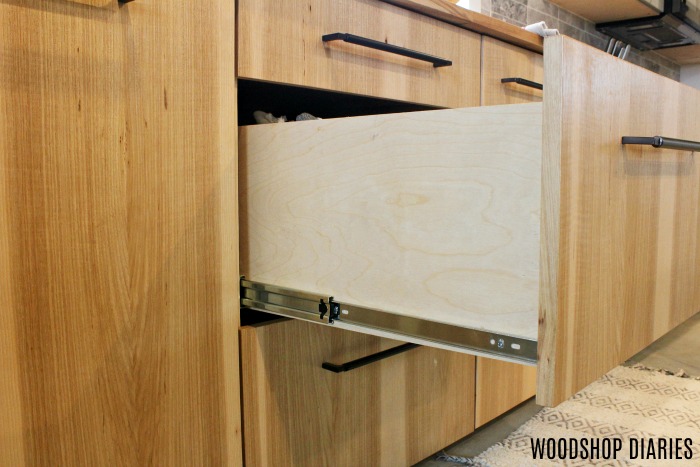
Cabinet Drawers:
Also, if you choose to install drawers instead of doors, I've got a mail service here showing how to measure out for, build, and install drawer southward.
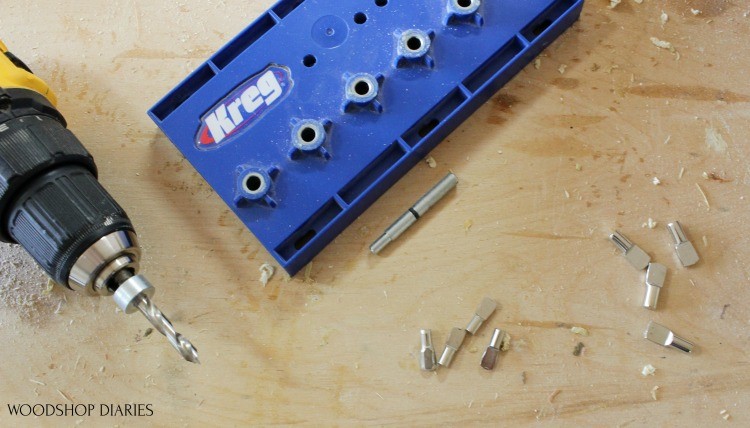
Cabinet Shelves:
Lastly, I added some shelves using shelf pins so they are adaptable. My Kreg Shelf Pin Jig came in handy for this and I cut ¾″ plywood to utilize as shelves for my cabinets.
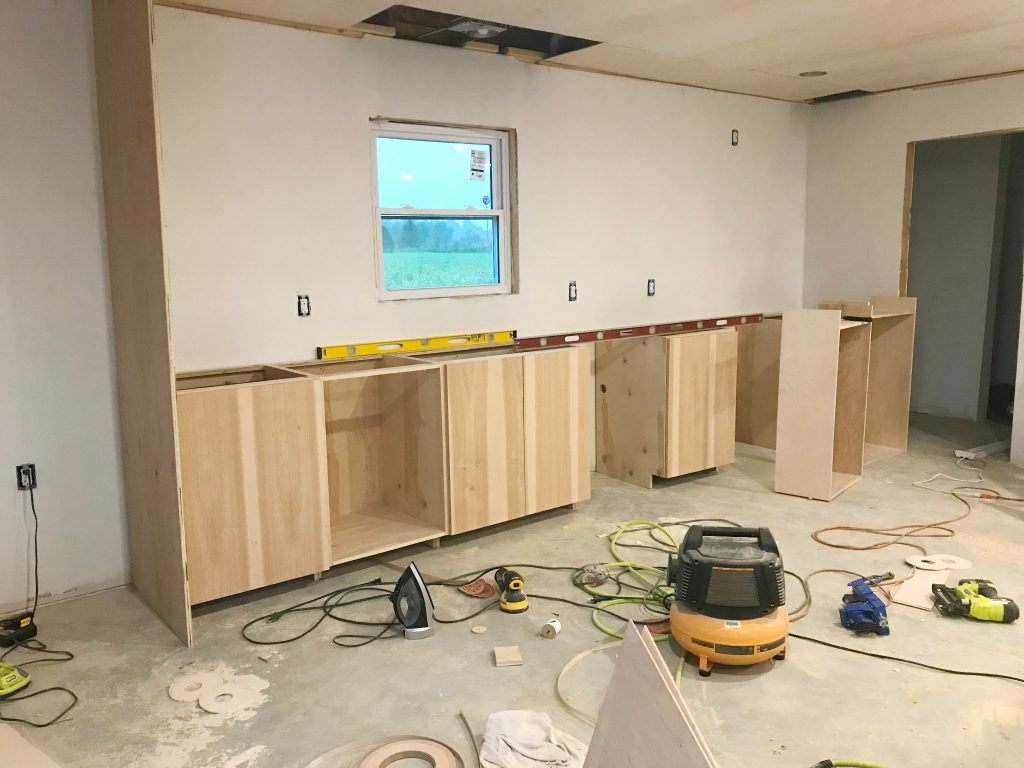
Step 8: Install DIY Base Cabinets
Now, to install these cabinets, I used shims to level them up where they go, screwed them TOGETHER through the side panels, then fastened them to the studs in the wall through the summit back support.
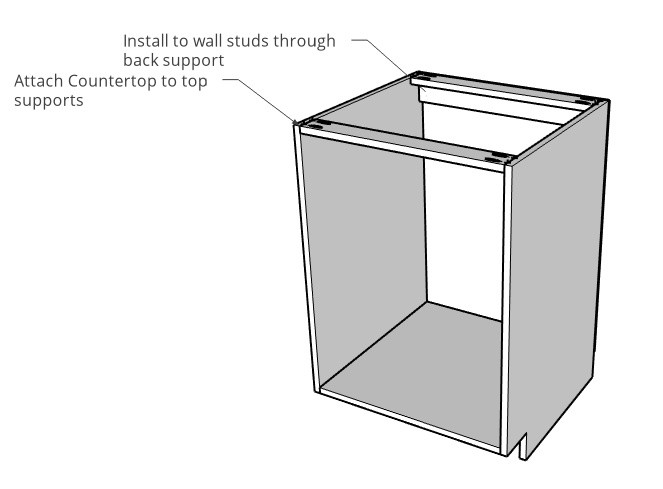
Once all the base cabinets were in place, I glued upward a solid hickory forest countertop (like in this mail) and attached through the top supports of the cabinet boxes. You lot can install whatsoever type of countertop you prefer.
And the final piece, was adding the toe kicks at the bottom. For the toe kicks, I ripped ¾″ plywood pieces 3 ¼″ wide and nailed into place like shown.
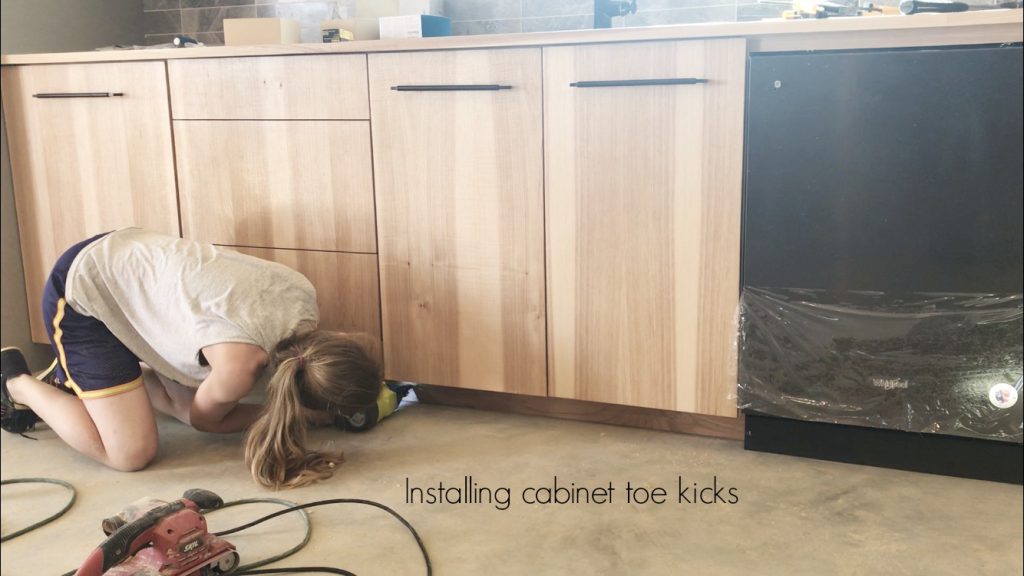
You'll take to trim down the size you need to embrace each section of cabinets you lot have put together. Then just nail into the carcass side panels using finish nails.
Step 9: Assemble Upper Kitchen Cabinet Boxes
At present, the plywood strips take been cut for the upper cabinets in stride 1. But they need to exist cut to length and assembled.
.
Upper cabinets are a little trickier as your side panels volition vary depending on if you want them to go to the ceiling, how high your ceilings are and how far off your countertop you want them to be.
.
They're SUPPOSED to be AT LEAST eighteen inches from the countertop to the lesser of the upper chiffonier.
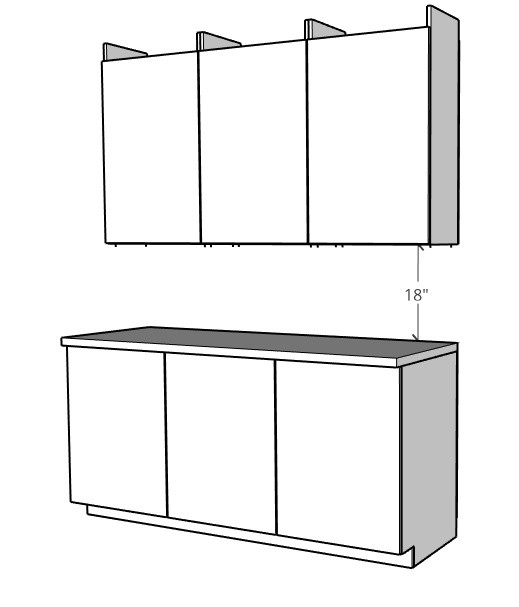
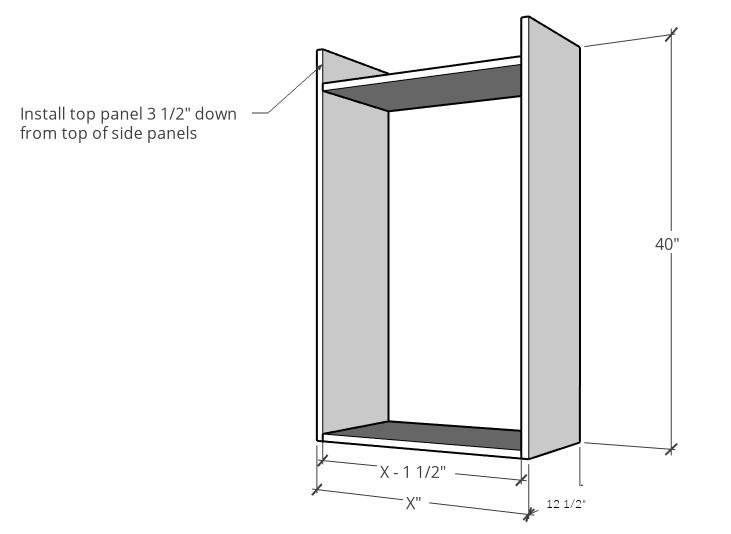
You will have to determine what acme your uppers need to be (I used 40″), just the top and bottom console pieces should be figured and cut merely like the base cabinets in pace 2 based on how wide you want your chiffonier box to be.
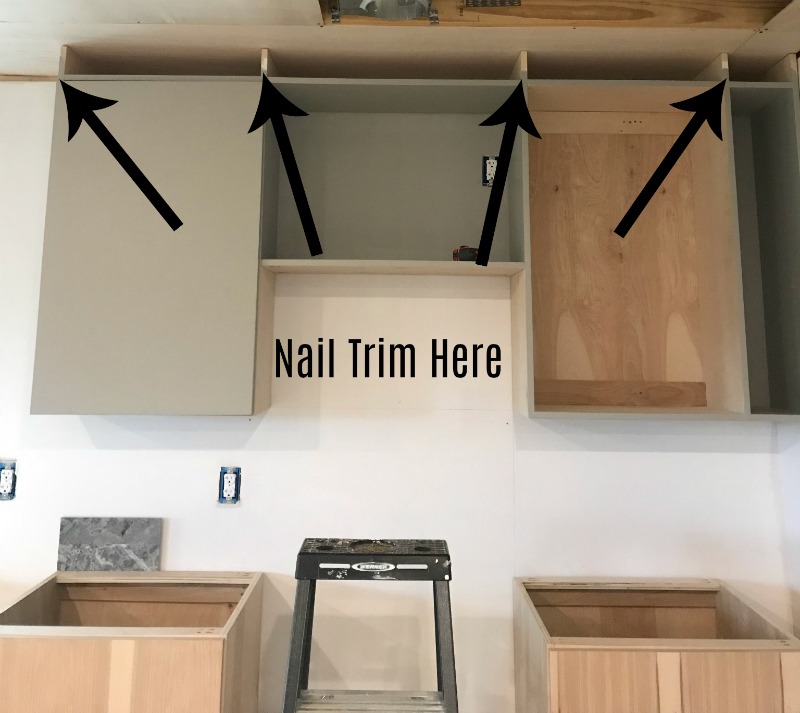
Now…I bet you're wondering why in that location'due south a space at the top in my diagram above. I wanted my cabinets to go all the way to the ceiling, BUT I was adding a piece of trim betwixt the cabinet and the ceiling and needed something to nail that trim to.
.
So I fastened my top panel three ½" from the top of the side panel. That manner, when I hang my cabinets, I can attach the trim along the height of the cabinets and take something to nail to.
If you lot aren't going to the ceiling or aren't doing the trim, then adhere your top panel flush with the top of the sides and same with the bottom.
.
I assembled these using ¾" pocket holes and 1 ¼" pocket hole screws similar the bases.
This time, I attached thin plywood strips betwixt the side panels—i at the top and ane at the lesser—like shown below. This is and so how you will hang them on the wall.
At this indicate, repeat steps 6 & 7 for these cabinets as well (adding a back, doors, and shelves).
.
So install them by leveling, shimming, and attaching them together and into the wall studs through the support pieces on the back.

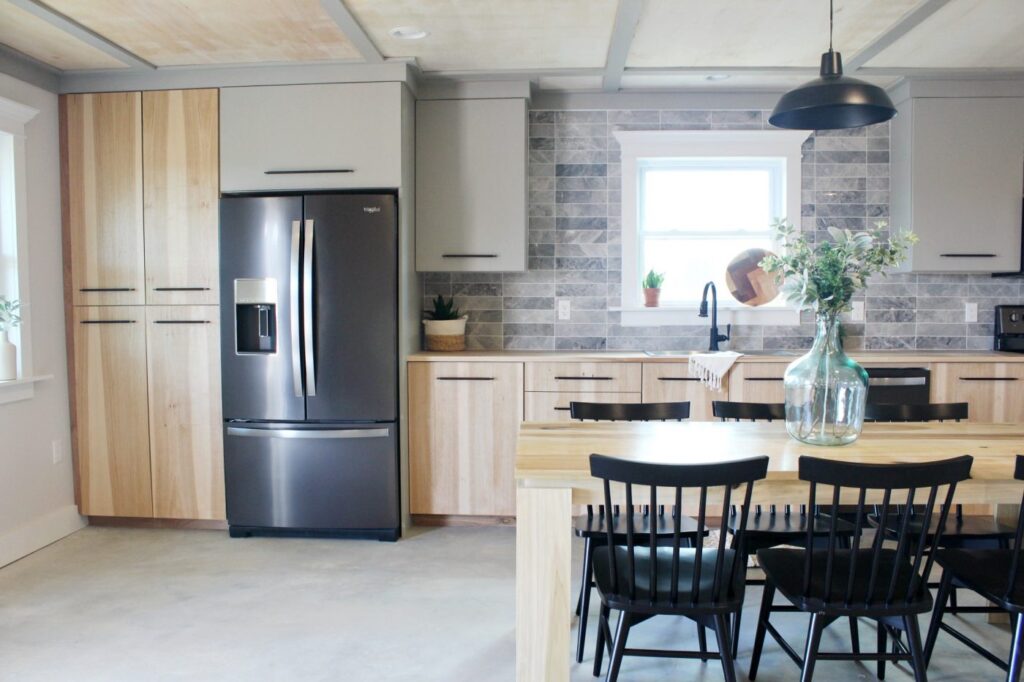
As a side annotation: you can hands modify the dimensions and utilise these instructions to build a pantry and a fridge box chiffonier as well. It'southward the same concept, simply slightly different dimensions.
Footstep 10: Install Ceiling Trim (Optional)
Depending on your own preferences and how you congenital your cabinets, calculation this trim is optional.
.
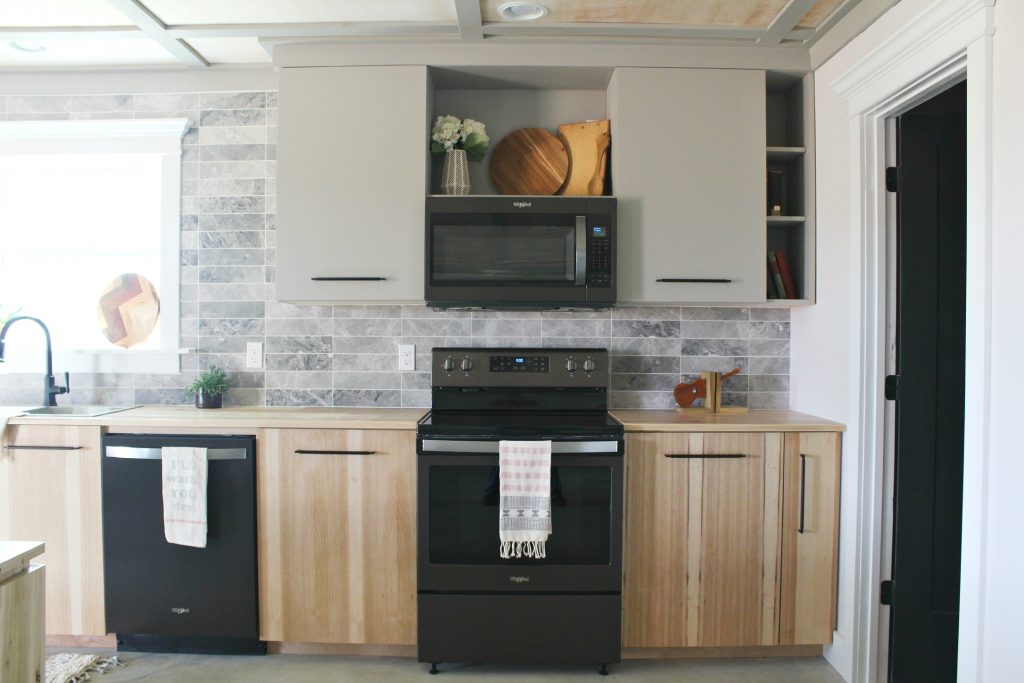
Only, I just glued and nailed a 1×3 onto a ane×4 lath and nailed this along the top as the trim. Y'all could practise crown molding or some other blazon of trim, but I just kept it simple and modern.

Step xi: Finish DIY Kitchen Cabinets
You lot can end the cabinets before or subsequently installation…I painted the uppers before installing and polyed the base cabinets after. So that's totally upwardly to you lot.
.
I merely applied a few coats of Minwax Helmsman H2o Based Poly on the bottom cabinets and the countertop.
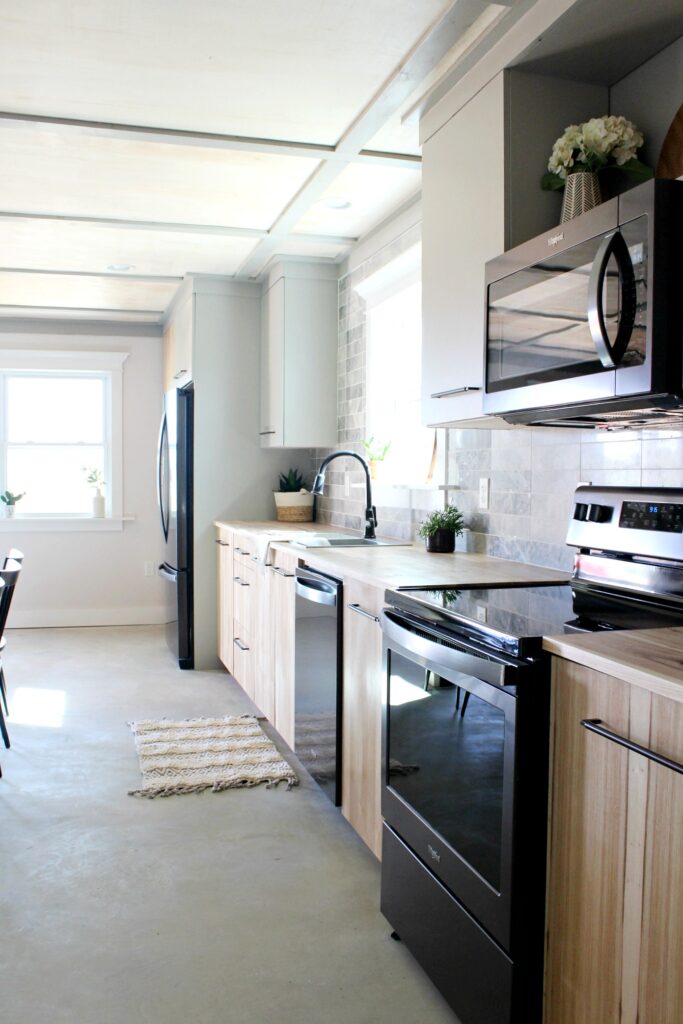
And for the top cabinets I practical 1 coat of Kilz primer (water based), and two coats of Sherwin Williams Dorian Grey on top subsequently information technology dried.
.
Once the finish is dry, yous can add your door and drawer hardware. I LOVE these Liberty Artesia pulls for a clean, modern wait. I also used these same pulls on my DIY mod nightstands recently.
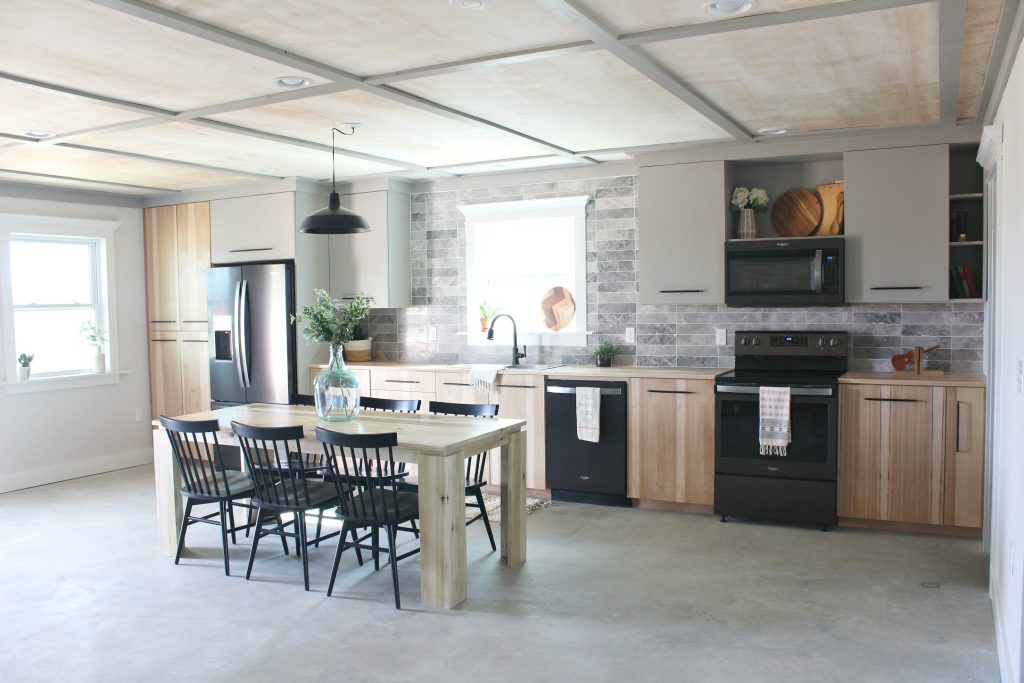
See, now? Building cabinets isn't difficult. Cut, get together, install, finish 🙂 You got this, my friend!
And if you want more details on the backsplash tile, check out this tutorial.
This post was LONG, but there is so much to say about edifice your own DIY cabinets. Simply…I have no doubt that if I can do information technology, you can, besides.
.
When you recollect of kitchen cabinets as simple boxes, its actually a unproblematic build you lot can exercise yourself if you give information technology a fiddling thought and double cheque your measurements 🙂
.
Now leave there and go building your new kitchen…Right afterwards yous pivot this for later 🙂
Until next fourth dimension, happy building 🙂
Source: https://www.woodshopdiaries.com/how-to-build-your-own-diy-kitchen-cabinets-2/
Posted by: talbottume1968.blogspot.com
0 Response to "How To Build A Wall Cabinet Youtube"
Post a Comment